|
Clay Demos and Clay Table |
|
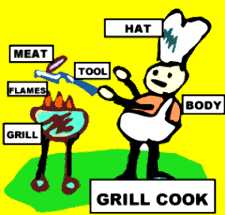
The use of Clay Demos is an excellent way to get the student involved in what he or she is studying. The student has to figure out how to demonstrate something. This activates his imagination and personal experiences. He has to relate the data in question to all kinds of things and figure out a simple and visual way to show it. Finally he has to give it a physical form and work out any additional problems he didn't think of at first. Clay Demos and the Mind In Standard Clearing Technology we are primarily interested in the mind and the spirit and traditionally these would be some of the toughest fields to demonstrate in clay. But any part or special term used in Standard Clearing Technology can be demonstrated on a Clay Table. This is an important point. The use of the Clay Table is not just for a few terms. It can be used for all definitions. The inventiveness of the student and his understanding of the terms being demonstrated are the only limits in Clay Table. Simplicity is what the student should strive after. Anything can be demonstrated if you work at it. Nothing is too insignificant or too complicated. Working out how to demonstrate something and make it into clay objects with labels bring about new understanding. The phrase, "how do I represent it in clay?" could be said to be the key to learning and teaching. If you can represent it in clay you understand it. If you can't, you didn't really understand what it was - or there was nothing there to be understood as it was a non-existent 'fact'. Working the Clay Table gets the terms or things fully understood. Working it all out in clay helps the student to a new, deeper, and simpler understanding. The only reason a student is progressing slowly or 'blows' (leaves suddenly) are rooted in misunderstood words in the training. Therefore, you will find that students will benefit greatly from Clay Table when new technical definitions are done in clay and others causing trouble are covered as well. Example: Words used a lot in Standard Clearing Technology are "Body" and "Thetan". 'Thetan' means spirit or the spiritual part of a person, the "I". The student forms a body with head, arms, and legs in clay and writes a label, saying 'Body' and attaches it to the little figure. Now he can look at it in the physical universe. Then he makes a little ring in a different color clay and puts a label, "Thetan", on that one. Now he can see the two items in front of him. The student's attention is brought right to the physical objects of the subject. Getting the student to do this Clay Demo with his own hands produces a new understanding. If he were made to make it repeatedly, each time figuring out a new way to demonstrate it, he would soon realize new things about the relationship between Thetan and Body. Now you have the student make a control system between the thetan and the body. This may simply be a piece of clay. Have the student label that "Mind", and the student will have demonstrated three of the main components he will work with when studying Standard Clearing Technology. In a similar way you can have him make the anatomy of a problem in clay. The definition of a problem is "Intention versus Intention; or Force, Counter-force. Any two things opposing each other and creating a balance or stand-still".
Labeling the Clay But by doing Standard Clearing Technology and the Clay Demos required you will soon realize that any part of the mind can be represented by a piece of clay and a label. The mass parts are done in clay, the significance or thought parts by the label. A piece of clay and a label are usually both used for any part of the mind. A thin-edged ring of clay with a large hole in it is usually used to show a pure significance. You could say "Thetan" is such a significance. Each part made in clay is labeled. Labels are usually made out of scraps of paper on which the name of the part is written with a pen. The student makes one object and labels it right away. Then he makes the next object and labels it. In other words, he labels everything as he goes along. To first make all the clay objects and then label them would be incorrect. It works best when done mass-significance, mass-significance, and so on. Otherwise he will have to stack up all the significances in his own mind during the process. So the correct procedure is label each mass as you go along.
Sizes of Objects The size of the demo can however be important. A Clay Demo should be rather large. Figures should be around 4 inches (10 cm) high. This is not a firm rule, but "bigger is better". Large demos help to increase the student's reality on what he is demonstrating. More reality adds up to more affinity and communication. End result: more understanding (ARC). Check-outs On the check-out the student turns the overall label face down on the table. The student must be silent. The examiner must not ask any questions. The examiner just looks and figures out what it is. He then tells the student who then shows the examiner the label. If the examiner could not see what it was it is a flunk. Clay Table must not be reduced to significance by the student explaining or answering questions. Nor is it reduced to significance by long-winded labels of individual parts. The clay shows it, not the labels. The clay demonstrates it. The student must learn the difference between mass and significance. All check-outs must keep in mind that the purpose is application, not just getting a checksheet complete. If Clay Table training is not brightening a student up, then the above is not being done. Someone is in such a rush that real learning is being set aside for the sake of speed. The Clay Table Set-up The Clay Table The Clay Clay is messy. Steps must be taken to keep table and students cleaned up afterwards. Paper towels should be available and the student should be sent out to wash his hands after working at the Clay Table. Different chemicals, such as mineral spirits and liquid soap, may be helpful in cleaning. The Clay Table should be an active and happy place as lots of use of Clay Table ensures better understanding, faster courses and minimal blows from course. It results in more competent students who can apply what they learn. |